Harlequin shrimp lit with two strobes
This image is of the same Harlequin Shrimp just moments later, using a snoot with the light coming from directly overhead.

A Harlequin shrimp under a snoot
You can see how the light illuminates the subject without lighting the surrounding environment. This has the effect of isolating the subject so that it stands out. This can be especially valuable when you have a very busy background, or the animal is in a place where it is hard to visually separate it from its environment. There are several different types of snoots, and each one works differently, although they all give similar results.
The Retra LSD Ultimate Light Shaping Device focuses the light from your strobe down to a point that can be shaped like a spotlight on a small object. This will block the light from reaching the surrounding area, isolating the subject. It has templates that you can use to customize the shape of the light (such as a square, or different sized circles.) With the focus light on your strobe turned on, it is easy to focus on the subject, as the light coming down through the snoot will illuminate the area that will be lit. The closer the snoot is to your subject, the more pronounced the circle of light will be. This Melibe nudibranch, for example, has the snoot very close to it giving the light a hard edge.

Melibe colemani nudibranch with hard edge lighting
Another type of snoot is made by Reefnet and uses fiber optic technology to direct the light to your subject. This snoot works by sending the light from your strobes through a bundle of fiber optic cables toward your subject. The advantage of a fiber optic snoot is that you have the ability to articulate the light in any direction you want. You can move the bendable arm so that the light is coming from any direction. It is also a bit more compact than the Retra, although the quality of the light is not as rich.
The following image of a Doto greenmayeri nudibranch was taken using two snoots; the Reefnet Fiber Optic Snoot with the light coming from underneath the nudibranch, as well as the Retra LSD with the light coming from above.

Doto greenmayeri nudibranch lit with two snoots
Lighting the nudibranch this way required an assistant to help hold the snoots, and the effect is that the nudibranch looks as though it is lit from the inside, without lighting up much of its surrounding environment.
There are many other snoots on the market such as the 10 BAR snoot. This one takes the light from your strobe and directs it through graduated tubes to make it smaller. It is also possible to make a homemade snoot this way using graduated PVC. The principle is the same: the light from your strobe is made a smaller diameter so that just your subject is lit.
Another advantage of using a snoot is that you can backlight your subject. Sometimes you have an animal that has an interesting shape, but that shape can be lost using strobes. Take this Rhinopias frondosa, for example. It has a lot of detail that can easily get lost against its environment. I was lighting it with one strobe (from the right) so that the animal’s own shadow would help isolate it from its background. It worked, somewhat, but the image has a lot of distractions.

Rhinopias frondosa lit with one strobe
This Rhinopias was lit using just a snoot from behind and slightly face on. It is a much more dramatic and interesting image.

Rhinopias frondosa backlit with a snoot
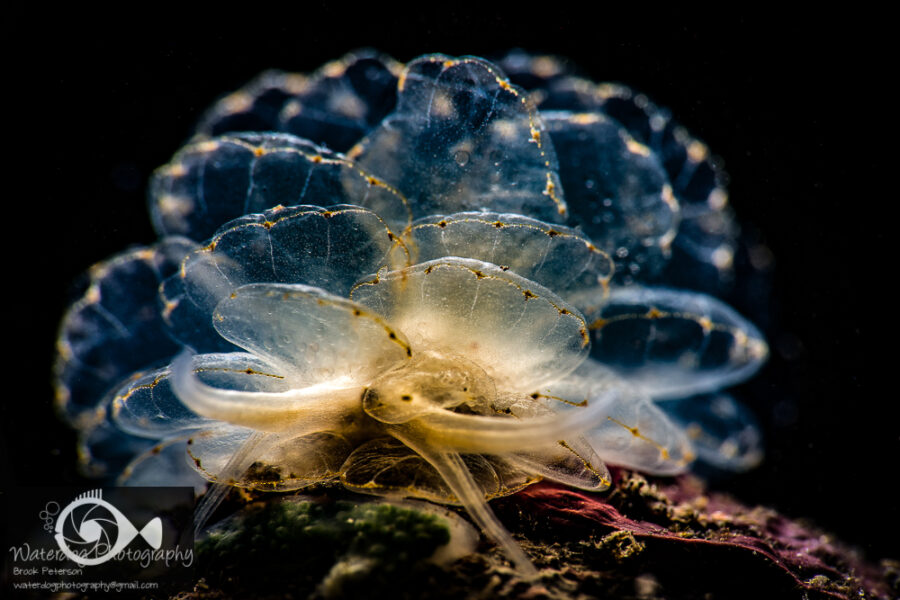
Some animals are more translucent than others, and lend themselves better to front lighting or backlighting. This Ceryece elegans nudibranch was shot using a snoot both from the front and from behind. When the light comes from different directions, the animal has a completely different look.

Ceryece elegans lit from BEHIND using the Retra LSD

Ceryece elegans lit from the FRONT with the Retra LSD
Most snoots produce similar results, so choosing a snoot is more about how you are going to use it, than which one is best. Do you want to be able to articulate the light? (Fiber Optic) Do you want to be able to see exactly where the light will be produced on your subject? (Retra and 10Bar). How portable do you want your snoot? Do you want to take it off or put it on easily during your dive? Some people attach the snoot to their strobe and leave it on for the entire dive for easier portability and less task loading. All snoots have a bit of a learning curve, so be patient as you learn how to use yours, and enjoy the results of your new edgy and snooty photography.
For information on using snoots in wide angle photography, please see my tutorial “Five Life Hacks for Better Wide Angle Underwater Photography.”
Join me for a workshop! Travel to a great destination where you will have exclusive coaching on your underwater photography. Meet new people, network, try new techniques, and learn with the pros! Click on Travel and Workshops for more information!
Subscribe now!
As always, if you enjoy my images please visit my website, waterdogphotography.com, or give me a like on Facebook at Waterdog Photography Brook Peterson. Don’t forget to follow me here at waterdogphotographyblog and please feel free to share on Facebook or other social media.
My photographs are taken with a Nikon D810 in Sea and Sea Housing using two YS-D1 or YS-D2 Strobes.
All images and content are copyrighted by Brook Peterson and may only be used with written permission. Please do not copy or print them. To discuss terms for using these images, please contact me.
copyright Brook Peterson 2017


