Using Focus and Blur Creatively in Underwater Photography
Focus is an important factor in any type of photography and in underwater photography it is a very important topic to understand. Proper focus shows the viewer a sense of intent behind the image. Sometimes it may be difficult to decide where to place the sharpest focus point. Other times, the entire scene may need to be in focus, or perhaps the entire scene should be blurred and only a small element in focus. These are all decisions made by the photographer to tell the story they want to tell. It is important to develop a skill set with a lot of choices so that you can use focus (and blur) creatively in your underwater photography.
The What, Where and Why


Generally speaking, when you create an image of an animal, you will focus on facial features just like you would if you were taking pictures of a person. The eyes are almost always the most important feature, and they should be looking into the camera to give a sense of engagement with the viewer. But what about animals that cannot look back at you, such as a nudibranch? Then you must find the next most engaging feature which, in their case, could be the rhinophores. Whatever feature you choose to focus on, it should be tack sharp even if other features are blurred.

Sharp focus is important when you want to emphasize a certain aspect of the photo. For example, in the image of a cardinal fish with eggs, I had to determine what story I wanted to tell. Should I show the entire fish with eggs? Are the eyes important? To me, the story is the contrast between the very sharp teeth and the very delicate eggs. So, my camera is focused on that without much regard for the eyes of the fish, or it’s body. This emphasizes what I think is important.
Focus is one of the most versatile tools we have as photographers to convey mood and tell a story. Look at the two images of Christmas Tree worms. How does each make you feel? Do you like one better than the other? When we look at any image, we have an internal dialog reasoning out why we do or don’t like it. Focus is the key to bringing attention to what you think is important.


Creative Focus for Emphasis
Sometimes we want to use focus creatively and there are many ways we can do that. To understand how to isolate a subject using focus, we also must understand bokeh and blur. Bokeh is the aesthetic quality of the blur around the focused part of an image. You can have a very soft creamy bokeh or something more defined, but in any case, the bokeh helps to emphasize the subject.
Aperture

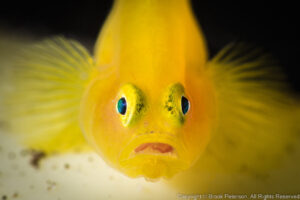
Bokeh can be created in several ways. You can use aperture, plane of focus, and distance together to get a creative effect. An open aperture will give you less depth of field which can add emphasis to a specific feature such as the eyes of the fish in this image. There is blur both in front and behind the eyes. The camera settings are f/5.6, 1/320, ISO 100. Because of the wide-open aperture, there is a limited plane of focus.
Plane of Focus (PoF)

PoF is an imaginary line parallel to the camera’s sensor and at a distance (that you determine by where you focus) from the lens. It contains the sharpest area of focus. If you are using a diopter, the PoF will become much shallower. You can use this to your advantage. The flatworm image was shot with a 105mm lens, Nauticam SMC diopter and camera settings ISO 100, f/22, 1/250. As you can see, the spots on the back of the worm “lift” off, creating an interesting bokeh. This is because the plane of focus is very shallow, and all in front of the worm, barely keeping the “face” of the flatworm in focus. Everything behind becomes blurred.
Distance

Distance from a subject or background also influences bokeh. If you have a subject that is a good distance away from its background, the background will be blurred just because the PoF is shallow. For example, imagine you take a picture of an apple in front of a tree. If you are within a few centimeters of, and focused on the apple, the tree will be blurred, no matter what aperture you use. If you back up a half meter away from the apple, the tree will become sharper. If you are many meters away from the apple, both the apple and tree will be in focus. The juvenile boxfish is half a meter off the bottom of the sand, but my camera lens is mere centimeters from the fish. You can see how the fish is in focus, but the background has a nice “pebbled” bokeh.
Using Lenses for Creativity

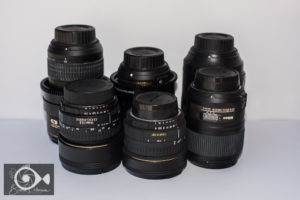
Different lenses cause different effects on sharpness and blur in an image. A fisheye lens will be much more forgiving when it comes to focus than a macro lens. As mentioned earlier, a macro lens paired with a diopter will be even less forgiving than a macro lens by itself. The more you magnify the subject with lenses, the less depth of field you will have. This makes it difficult to get an entire macro subject in focus if you are using a macro lens. If you have a large sensor on your camera, you may be able to back up enough to get the entire subject in focus and then crop the image in post-processing. Some compact cameras have modes that allow smaller subjects to be completely in focus. Alternatively, find something that is interesting about the animal and focus on that.

Around 1952 a lens called a trioplan was invented. It was prized for its exceptionally smooth bokeh, sharp focus, and soap bubble bokeh. It has recently been re-released. Although challenging to use in underwater photography, it gives a creative look to an image. The damsel fish and the secretary blenny were both photographed with this lens. The “soap bubbles” on the blenny photograph are created as a double exposure. The bubbles were made by taking an image of out-of-focus colored lights and superimposing that image over the blenny in-camera.
Dragging the Shutter

Another interesting technique is using a very slow shutter speed to get a sense of motion in a photograph. This effect is accomplished with a combination of strobes and a shutter speed of approximately 1/8th to 1/13th /second and ambient light. You will have to compensate for the slow shutter speed by using a higher f/stop and possibly a lower ISO if you are in bright water. The technique is achieved by moving the camera while taking the shot. Since your strobes fire in merely a fraction of the time the shutter will be open, the strobes will “freeze” the subject on your sensor, but the additional time the shutter is open will blur whatever is lit by ambient light.
The key to using focus creatively is to plan. Decide before your dive if you want to try some creative techniques then take the appropriate equipment with you. Each time you do this, you gain experience. Put that experience into your mental “tool” box so that you can use it at a moment’s notice. The stories that we tell as photographers can be varied and interesting when we develop skills that emphasize our abilities and enhance our photographs.
A word about camera tools
If you are unfamiliar with the tools your camera has to offer, you should start with the camera’s manual. Many cameras offer you options such as manual or autofocus, continuous focus or single servo, back button focus, and area focus. These topics may each need their own tutorial and will only be referred to briefly in this article. However, I will explain the settings I use:
- I shoot with a Nikon D850 and I have it set up so that the button on the back of the camera is used for focus instead of using the shutter release button. This allows me to lock focus with my thumb, and take the shot without the camera re-focusing at the last minute.
- I also use continuous focus so that if I am shooting a moving animal it will stay in focus until I take the shot as long as I hold down the focus button.
- I use autofocus, but since I have assigned the back button to be the focus button, I can let go of that button and gently rock the camera back and forth to attain “manual” focus on an animal. Usually this is done for macro or super macro to get the eye or other important feature in perfect focus.
- Depending on whether I am shooting wide angle or macro, I will set up the focus area differently. With macro I will use a single point. I can move that point to different areas of the frame so that the camera will focus just on that one point. With wide angle, I will use dynamic area focus. This means that several points are used to attain the best focus in the entire frame. This allows me to focus on large animals or entire reefs.
This article was originally published in Dive Log Australasia, August 2022. You can read it HERE.
Join me for a workshop! Travel to a great destination where you will have exclusive coaching on your underwater photography. Meet new people, network, try new techniques, and learn with the pros! Click on Travel and Workshops for more information.
Subscribe now!
As always, if you enjoy my images please visit my website, waterdogphotography.com, or give me a like on Facebook at Waterdog Photography Brook Peterson. Don’t forget to follow me here at waterdogphotographyblog and please feel free to share on Facebook or other social media.
My photographs are taken with a Nikon D850 in Sea and Sea Housing using two Retra Pro Strobes.
All images and content are copyright protected by Brook Peterson and may only be used with written permission. Please do not copy or print them. To discuss terms for using these images, please contact me.
© Brook Peterson 2022

