Mastering light underwater is a challenging skill we can learn as photographers. Underwater, that skill must be developed even more because of the limitations we face with available light and technology. Three types of light are used in underwater photography; natural light, artificial light, and the blending of the two. Natural light is an essential element we must make use of and the strobes on your rig are versatile tools that can help make beautiful images when used correctly. Learn to use light creatively and you are well on your way to becoming a proficient and talented underwater photographer.
Natural Light
As every certified diver is taught, color begins to disappear from view as a diver descends into the deep. First to go are the reds, then oranges and yellows. The deeper you are, the less color will appear until everything appears blue. For underwater photographers, this can be frustrating because our cameras will not pick up the colors that our mind can still see. Fortunately, there are several good remedies for the loss of color in our photographs.
Because reds and oranges disappear first, we can put a reddish-orange filter over our lens to counteract the blues at depth. Filters come in several forms. Some are like a glass lens cap that go over the front of your lens, while others are a semi-rigid film that go over the back of the lens before mounting it to the camera. Some filters are “wet” meaning they can be mounted while diving. Whatever their form, the filters are designed to put more reds and oranges back into an image.


One advantage to using a color filter under water is that the filter will make the color appear throughout the image. Without a filter there is a fall-off of light from the strobes so that the color in the background that is not hit by the strobes appears cyan. With filters, there is no cyan cast.
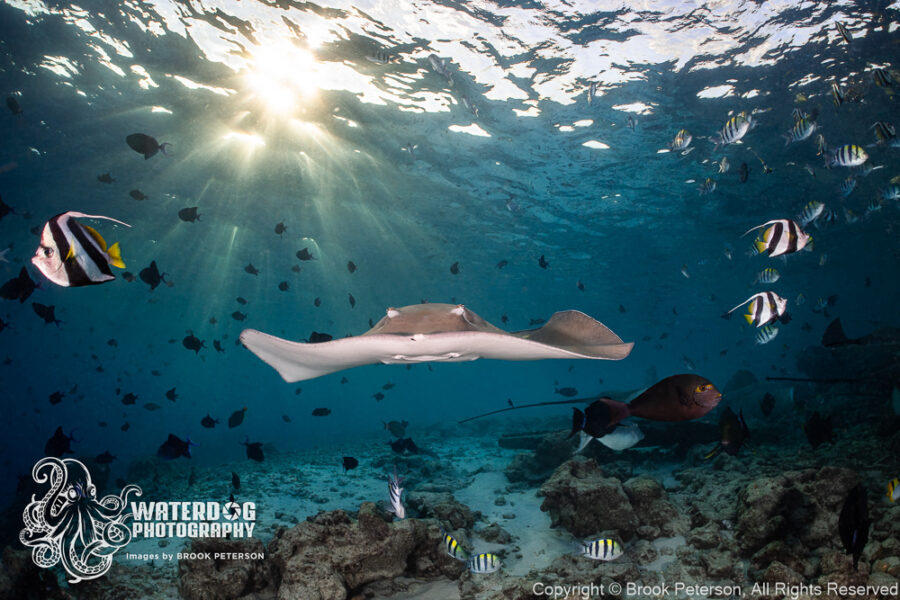
It is possible to get great images without a filter and using only light from the sun. You will have to be shallow enough that the light penetrating from above is bright enough to light up your subject without using strobes. Examples are shallow reefs, large surface-dwelling animals such as whales, dolphins, and whalesharks, and clear, shallow springs.


Artificial Light

Let’s talk about backscatter. It may well be the bane of underwater photographers. Backscatter is when tiny particles that are not on the plane of focus are lit up by the strobes. They appear as white blobs throughout the image. But truly, there is one rule that you can use to avoid most backscatter issues and that is to be sure your strobes are back behind your dome port. A good rule of thumb is that the heads of the strobes are no further forward than the handles on the housing.
Since backscatter is caused by particles in the water reflecting the light from your strobes back into your lens, many people will turn their strobes slightly out or in, so that the angle of reflection bounces away from the camera lens. You can try this, too, as it might be a solution for you, especially if you dive in lower visibility conditions. However, I have had the exact same results with my strobes facing straight forward, so I prefer not to worry so much about the direction the light is going to bounce. Instead, I will put more effort into how high the power is on my strobes. Often, just turning the power down a bit on one or both strobes will reduce backscatter.
Tip: Dome diffusers on your strobes may also help reduce backscatter.

Strobe position is another hot topic, and there are a lot of ideas out there. How close should the strobes be to your housing? How high or how low? What if you want to make a vertical image? What about close focus wide angle? What about big animals? Each circumstance merits consideration as the position of your strobes may require a change for each one. The basic position that I use for a good majority of my work is to have the strobes about 8-12 inches away from the housing, facing straight forward, with the strobes positioned at nine and three o’clock.
Variations of this are fine, but in general, this is the position I will use when I am just swimming around looking for my next subject. Then, if something like a sea lion approaches suddenly, I am ready to shoot.
Tip: A good rule of thumb for how close the strobes should be to your housing is to place them about as far apart as you are from your subject. In other words, the strobes in the picture above are about 18-24 inches apart. Using this rule, I should be about 18-24 inches from my subject to get proper lighting.

The height of the strobes depends on how large a subject you want to light. If you are trying to light an entire reef, you might consider putting your strobes up above your housing so that the light can be cast evenly over a large area. You can adjust the distance that the strobes are from each other according to how wide an area you want to light. Keep in mind, however, that the light comes out from the strobes in a cone shape, and you want that cone of light to cross in the middle so that there is not a dark area in the middle of your image.
Vertical images can be a challenge and there are a couple of different ways you can light them up. When you turn your housing so that it is vertical, you will have one strobe on the top at twelve o’clock, and one on the bottom at six o’clock. This is just fine if you are shooting a large scene, or you are a few feet from your subject. It becomes a problem when you are close to your subject, or you want to shoot something where one of the strobes (usually the one on the bottom) is too close to the subject. This may result in part of the image being blown out.
Tip: The solution to this is to turn the bottom strobe down (about ½ -¾ power less than the top strobe.) The bottom strobe is closer to the subject and therefore needs less light than the top strobe. Even lighting does not mean the same power is coming from both strobes.


Another solution to properly lighting a vertical image is to move your strobe arms around the housing so they are at 9 and 3 o’clock with the camera vertical. This may work well for some, and gives a vertical image even lighting. It may take a bit more effort while shooting, but the reward is a properly lit image without having to adjust the power of your strobes as much.
Blended Light
Blended light is when ambient light and strobe light are used so well together that the viewer cannot distinguish the two from each other. This type of lighting is often used in wide angle photography, particularly close focus wide angle photography (CFWA.) CFWA photography is when you have a relatively small subject in the foreground along with something in the background such as a diver or the surrounding environment. It is important to light images such as this so that the subject, surrounding area and the background light blend together. You want the viewer to see the image as one beautiful picture, instead of noticing that you have used artificial light on part of it.

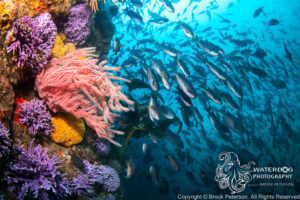
For example, the gorgonian fan in the image above was only a few inches from my dome port. It and the reef around it looks like there is no artificial light and the ambient light in the surrounding kelp forest blends with the light from my strobe. It appears that the light comes from above all from the same light source. That should be your goal in any close focus wide angle image. I achieved this by putting my strobes a little above my housing which was in vertical position, at about ten and two o’clock. The strobe on the right is set at a slightly higher power than the one on the left because the reef was a bit further away on that side.
Lastly, big animals can be a challenge to light properly for several reasons. In most cases, I expect to be from two to three feet away from a large subject such as a shark. But in this case, I will pull my strobes about 24 inches apart and turn the power up to one stop under full power. I will also meter for the ambient light at the depth I am shooting at. A good jump setting on a DSLR in clear blue water is f/11 and 1/125th with ISO at around 400. This can vary greatly, but it is a good place to start.

The turtle to the right was very close to my strobes and is entirely lit by them, while camera settings are adjusted for the bright sunlight at f/16, 1/250th and ISO 200.

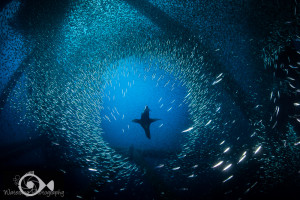
This shark is also entirely lit by my strobes as is the reef to the right-hand side. The left-hand side is getting little to no strobe light. If no strobes were used, the entire picture would look cyan, like the bottom left-hand corner. This is a good illustration of how blended light works. The viewer does not realize that the shark and sponges have strobe light because the light is blended with the ambient light (blue water.)
Photographers spend their entire careers mastering light in their images. Utilizing a few tips such as these can help you on your way to conquering light in a way that will make your images stand out from the crowd. Don’t be afraid to experiment and change up the rules. Sometimes we get hung up on how to accomplish a task, rather than experimenting with our equipment. The main goal is to make your images look like they are naturally and evenly lit. Remember this and you cannot fail.
This article was originally published in Dive Log Australasia, June 2022. You can read it HERE.
Join me for a workshop! Travel to a great destination where you will have exclusive coaching on your underwater photography. Meet new people, network, try new techniques, and learn with the pros! Click on Travel and Workshops for more information.
Subscribe now!
As always, if you enjoy my images please visit my website, waterdogphotography.com, or give me a like on Facebook at Waterdog Photography Brook Peterson. Don’t forget to follow me here at waterdogphotographyblog and please feel free to share on Facebook or other social media.
My photographs are taken with a Nikon D850 in Sea and Sea Housing using two Retra Pro Strobes.
All images and content are copyright protected by Brook Peterson and may only be used with written permission. Please do not copy or print them. To discuss terms for using these images, please contact me.
© Brook Peterson 2022


