Most photographers know that light is crucial to good photography. The way light is applied to a subject can drastically change the way we perceive it. When I first began taking pictures under water, I had a compact camera with an on board flash. But my images came out looking blue or green. There just wasn’t enough light. Then I purchased a small strobe and everything changed. The strobe had enough power to light my subject and some of the surrounding environment. As my skills improved, my lighting needs evolved and it wasn’t long before I was using two strobes.
I am always learning new lighting techniques. Some of my favorites include using a snoot, using fill light, and strobe placement. I think they all take a lot of practice to master, but the snoot seems to be many a photographer’s arch nemesis. Put simply, a snoot is tool that channels light from a wide beam down to a small area. It is used to light just the subject and not the surrounding environment. There are different types of snoots, too. Some, funnel light from the strobe into a beam that looks like a spotlight. Others use fiber optics that enable the photographer to articulate the light in any direction.

Many-Lobed Ceratosoma image created with a fiber optic snoot
This nudibranch was photographed using a fiber optic snoot positioned directly above the subject. In the image following, the same nudibranch was photographed using one strobe on the right side.

Many-Lobed Ceratosoma lit with one strobe.
Notice how much of the surrounding environment is lit when the strobe is used. It can be very creative and pleasing to light only your subject or even a portion of your subject.

Snoots can also be used for wide angle photography. In this case, the snoot is used to reduce backscatter, or light just a foreground subject. The snoot used in the image below was nothing more than an old wetsuit sleeve that was cut off and placed over the end of the strobe so that the beam angle would be reduced to something like a spotlight. This enabled me to light up just the foreground subject without lighting any particles in the water.

The “go-to” article on using snoots was published by Dive Photo Guide and Keri Wilk. For more in-depth information on snoots, check out the article HERE.
Fill light is another technique I have come to appreciate. It was only recently that I learned that I didn’t have to have both my strobes set to the same power when I was taking an image. When one strobe is set to a higher power and one to a lower power, you can have a subject that is strongly lit on one side, while filling in with a little bit of light on the other. This can create more dramatic texture and shadows in your image.

In this image, the strobe on the left was set to half power, and the strobe on the right was set to 1/4 power. That allowed the texture in this nudibranch’s rhinophores and branchial plume to appear more defined.
Finally strobe placement is probably the most important and most used technique I have up my sleeve. I am continuously moving my strobes around. It is important to think about the direction the light is coming from in order to properly light your subject. Sometimes you want the light to come from directly above the subject. Such was the case with this jawfish that would not come out of its hole. In order to light it properly, I had to aim my strobes directly down on the fish.

Jawfish with eggs
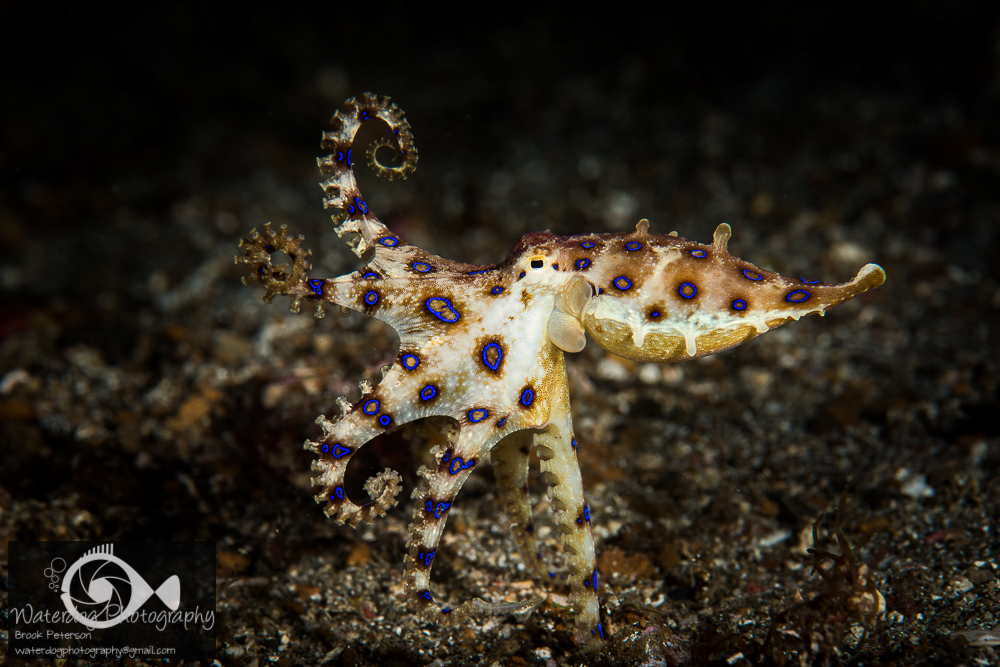
Other times you may want to isolate the subject against a black background. In this case, the subject has nothing behind it but water, and the strobe light is coming from directly in front of the subject.

You can also isolate the subject from a busy background by turning your strobes in towards your camera housing. This way, only the edge of the strobe’s light beam reaches your subject, and the background remains dark.